JavaScript is not currently enabled, but is required for full CodeSonar manual search and browse functionality.
If you are viewing this file in your hub's Web GUI, enable JavaScript in your browser: you will also need it for GUI functionality.
If you opened this file directly from disk, your browser may be directly suppressing JavaScript functionality: certain browsers perform this suppression on local files (but not files delivered by web servers) for security reasons.
| CodeSonar® 9.0p0 Hot Tips | CONFIDENTIAL | CodeSecure Inc |
This is the main section for CodeSonar installation instructions.
Install CodeSonar:
CodeSonar SaaS Note: if you are using CodeSonar SaaS, you will be using an external SaaS hub instead of running your own hubs.
Note in particular that you do not need to install CodeSonar on machines that will only be browsing analysis results through the CodeSonar Web GUI.
As an alternative to installing CodeSonar directly, you can use the CodeSonar 64-bit Linux installer to install and run CodeSonar on a Kubernetes cluster. You can run both your hub and your analyses on the cluster, or run your hub on the cluster and perform analyses elsewhere.
If you wish to deploy CodeSonar on Kubernetes, follow the instructions in section Install CodeSonar on a Kubernetes Cluster.
If you are upgrading an existing CodeSonar installation,
follow these steps. $CSONAR refers to the
CodeSonar installation directory.
If you are not upgrading, go on to Installing/Upgrading CodeSonar
CodeSonar SaaS Note: if you are only using SaaS analyzers managed by CodeSecure, there is no need to keep your previous installation. If you have performed some or all of your analyses locally (that is, without using SaaS analyzers), you may wish to keep the previous installation for convenience as described below.
If you keep your previous CodeSonar installation, you will retain the ability to view information (in particular, source file listings) that is stored in the analysis directories for analyses performed on this machine with the previous installation. If you do not keep your previous CodeSonar installation, you will only be able to view this information once you have re-analyzed the project with the upgraded installation. Note that this applies only to information stored in the analysis directory. Most information, including warning reports, is stored on the hub and will remain available regardless of whether or not you keep the previous installation.
You will receive email from CodeSecure with download instructions that include the following.
If you haven't already done so, download the installation file now:
Your downloaded file will be a Windows installer whose name is codesonar-9.0p0.20250314-x86_64-pc-win64.exe (the date stamp part of the name may vary).
The installer must be run by a user with Windows Administrator privileges. If necessary, consult your system administrator to arrange installation.
Run the installer, following the on-screen instructions.
If you are running Windows Vista or later with User Account Control
enabled, your system will pop up a dialog asking for permission
to continue running the installer.
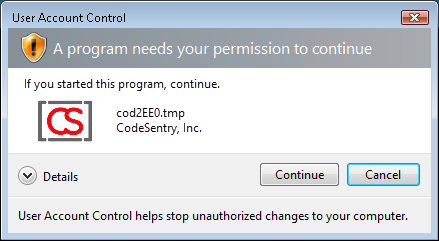
Click Continue to proceed with
installation.
 |
Click Next to start working through the setup wizard. |
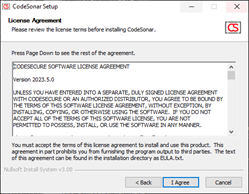 |
Read and accept the CodeSonar license. |
 |
Specify whether or not you wish CodeSonar to upload anonymous usage statistics to CodeSecure. You can enable or disable uploading at any time. |
 |
If you want to use CodeSonar on CodeWarrior
projects, select CodeWarrior
Support on the Choose
Components screen. For more information see CodeSonar with CodeWarrior.
Leave Set Firewall to Allow Connections selected to have the installer automatically add Windows firewall rules permitting communications with any CodeSonar hubs you start. Deselect it if you will not be starting any hubs, or if you prefer to add firewall rules manually. |
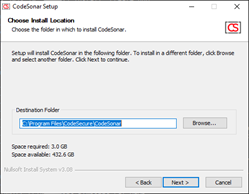 |
Specify an installation folder for CodeSonar. |
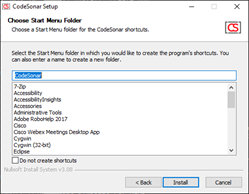 |
Select a Start menu folder for CodeSonar shortcuts. |
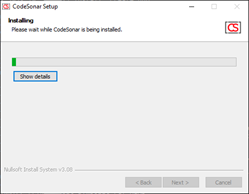 |
CodeSonar will be installed on your machine. | 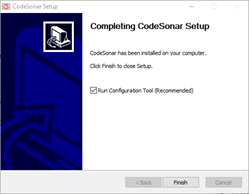 |
Once installation has finished, the final screen is displayed. |
You can run the CodeSonar installer silently from the command line. This is most likely to be useful for organizations where IT staff will be performing installation for users.
| /D=path | CodeSonar will be installed at path. (The default installation location is C:\Program Files\CodeSecure\CodeSonar.) | ||||
|---|---|---|---|---|---|
| /NOREG={yes,no} |
Default: no
|
||||
| /NOCRT={yes,no} |
Default: no
|
||||
| /SM=path/to/shortcutdir |
The installer will place a CodeSonar shortcut in the
directory specified by path/to/shortcutdir. There are
two likely use cases.
If not specified, the installer will place the shortcut in the Start Menu folder, and it will appear in the Start menu. |
You can also uninstall CodeSonar silently:
Now go on to Setting Up The Hub.